
I used to have five gear lists: winter, summer, and a couple built around particular trips. Swap a tent and you're fixing the weight in five places. A list tells you what is there. It does not make the difference between two lists easy to see.
Pick two packs
If you're signed in, choose your own packs from either side. You can also paste a public LighterPack share link or a shared OutPack pack into either side. Signed out, two public links are enough. Nothing is imported or saved just to look.
Open compare packs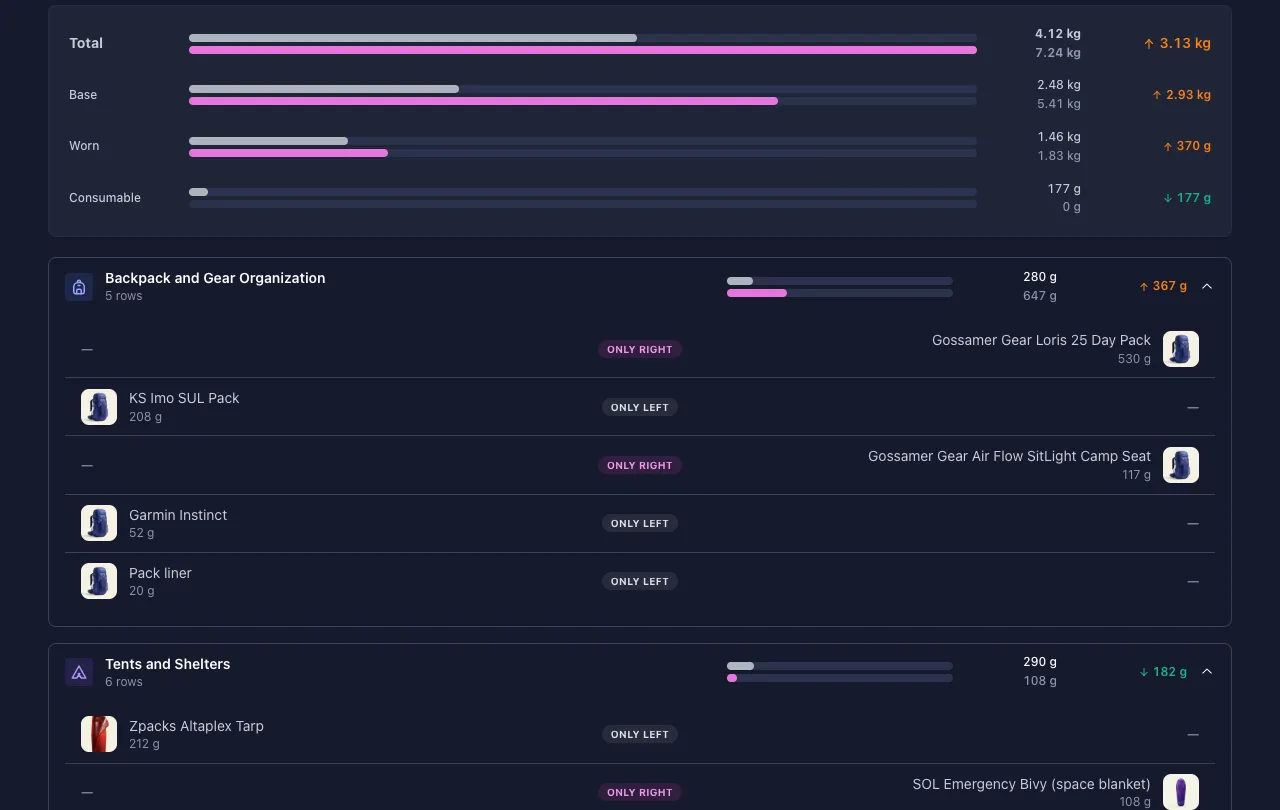
A shared scale makes the difference visible before you start reading rows.
Start with the weight
The result starts with four measures: total load, base weight, worn weight, and consumables. Both sides use the same baseline, and the difference tells you which pack is heavier or lighter. Below that, the gear is grouped into OutPack's categories so the comparison still reads like a pack, not a spreadsheet export.
The matching is deliberately conservative. Gear with a strong identity or a good name match is paired. Items without a counterpart stay in their own column rather than being forced into a misleading pair. Switch to Differences when a long list only needs a quick shakedown.
Then inspect the gear
Click a row when the name and weight aren't enough. The detail view can show the item type, category, quantity, price, product link, and the category it had in the original list. Your own gear links back to its item page. Gear from a LighterPack or shared pack can be added to your wishlist when you're signed in.
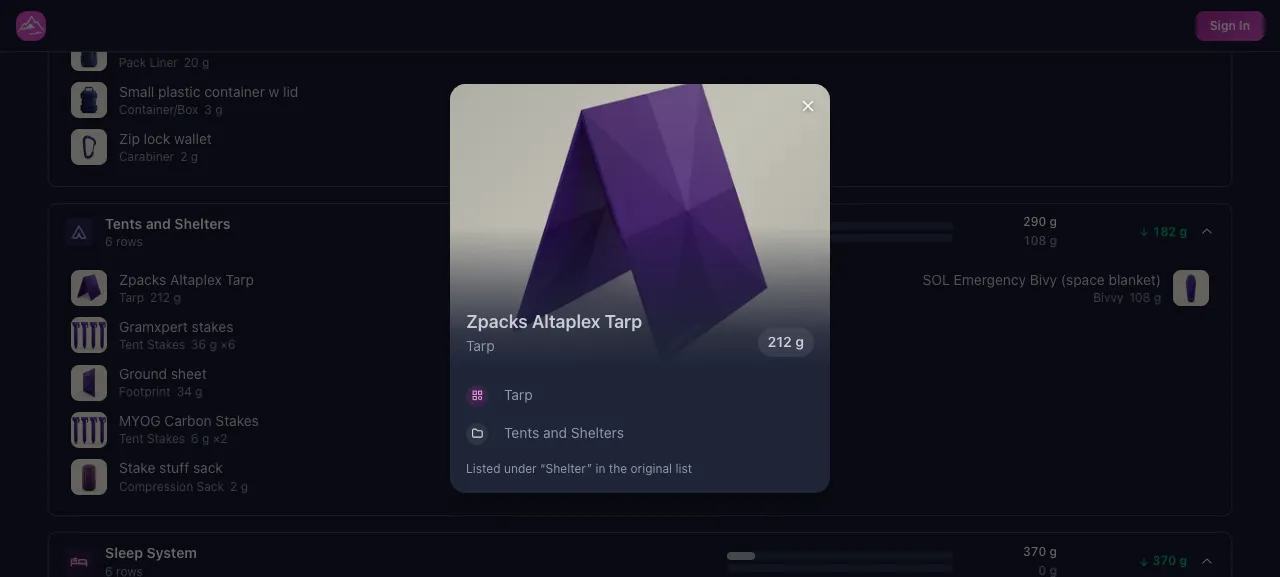
Click through when a row gives you an idea worth keeping.
A quick comparison, not another import
This page is for the first question: what changed? It lets a public LighterPack list sit beside your pack without asking you to make a copy. If the list earns a place in your gear closet, CSV import is still there. Comparison is simply the quicker first step.

I hope it makes the next gear shakedown a little quicker.
— Andrew